For the basics of the outfit I used Simplicity patter 4059 view B. I lengthened the pants, removed the peplums, and added the sectionals to the bottom of the tunic instead of the top. The shirt was basically the same except that I made it larger and stiffened it to stand up instead of lay down.
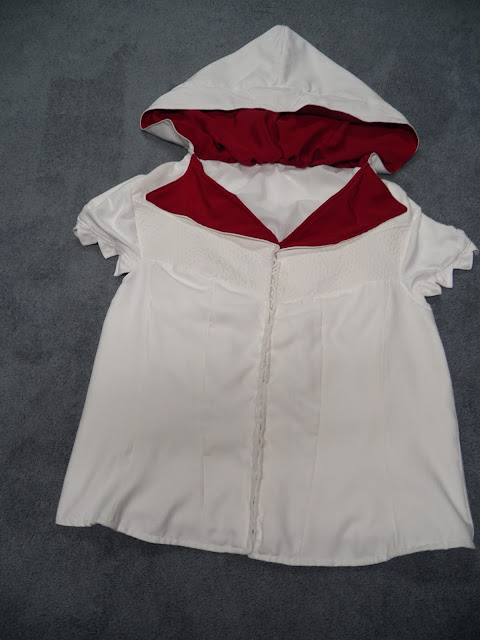
Here is the completed shirt. I didn't add a ruff to the inside collar because 1: He is traveling and it's going to be squished inside a suit case and ruin the look of it and 2: I don't know how to make it stay permanently after a wash in the machine. There are about 12 yards of ribbon in the sleeves.
This is the first time I've made pants that aren't elastic waistband and only the second time I've ever made pants. I had to lengthen them though since in the pattern they were only supposed to be mid-calf and on him they were about knee length. They are full at the bottom per his request. He likes the sound they make when he high kicks and they snap. I also had to take them in about 6" to get them close to his size and even then it's was a good thing they have extra drawstring in the back.
Front view of the chaps. You can see some of the embroidered parts well here. The embroidered fabric was actually a cream color so I tried to soak it in hot water and bleach for a few hours and it came out a perfect match! They open and close in front by button.
Back view of the chaps. I really like how the chaps turned out.
Here we have the tunic/hood. You cant see it all that well but the hood has a small point in the center front and has some stitching in a "V" around it as well as across the whole front from side to side. I added some of the layers together and put them all on the tunic instead of having 3 -4 layers he'll just have 2. The alligator teeth are attached as well as the lapels which in other pictures were a layer under the tunic. You can see some of the "invisible" lacing in the front. It lays nicely once you have the laces all even.
Here we have the back view of the tunic. I didn't get all the details perfect but it is close. I think the top stitching really helped give it an authentic-ish and a finished look. This is actually interlined and lined, so yes it's thicker than I originally planed but it gives it a rich, quality look in person. For the points on the sleeve edge I made continual prairie points. They were surprisingly as easy as they looked.
I hope you enjoyed looking at my completed costume of Ezio's uniform!


